How to Get Started with the SuperIntern Team Plan: From Workspace Creation to Inviting and Joining Members

The SuperIntern Team plan is built for using SuperIntern as a team.
You subscribe at the Workspace level and manage members, permissions, and billing in one place.
This guide walks through the sign-up process in two parts:
- For admins: creating a Workspace, completing payment, and inviting members
- For members: joining from the invitation email
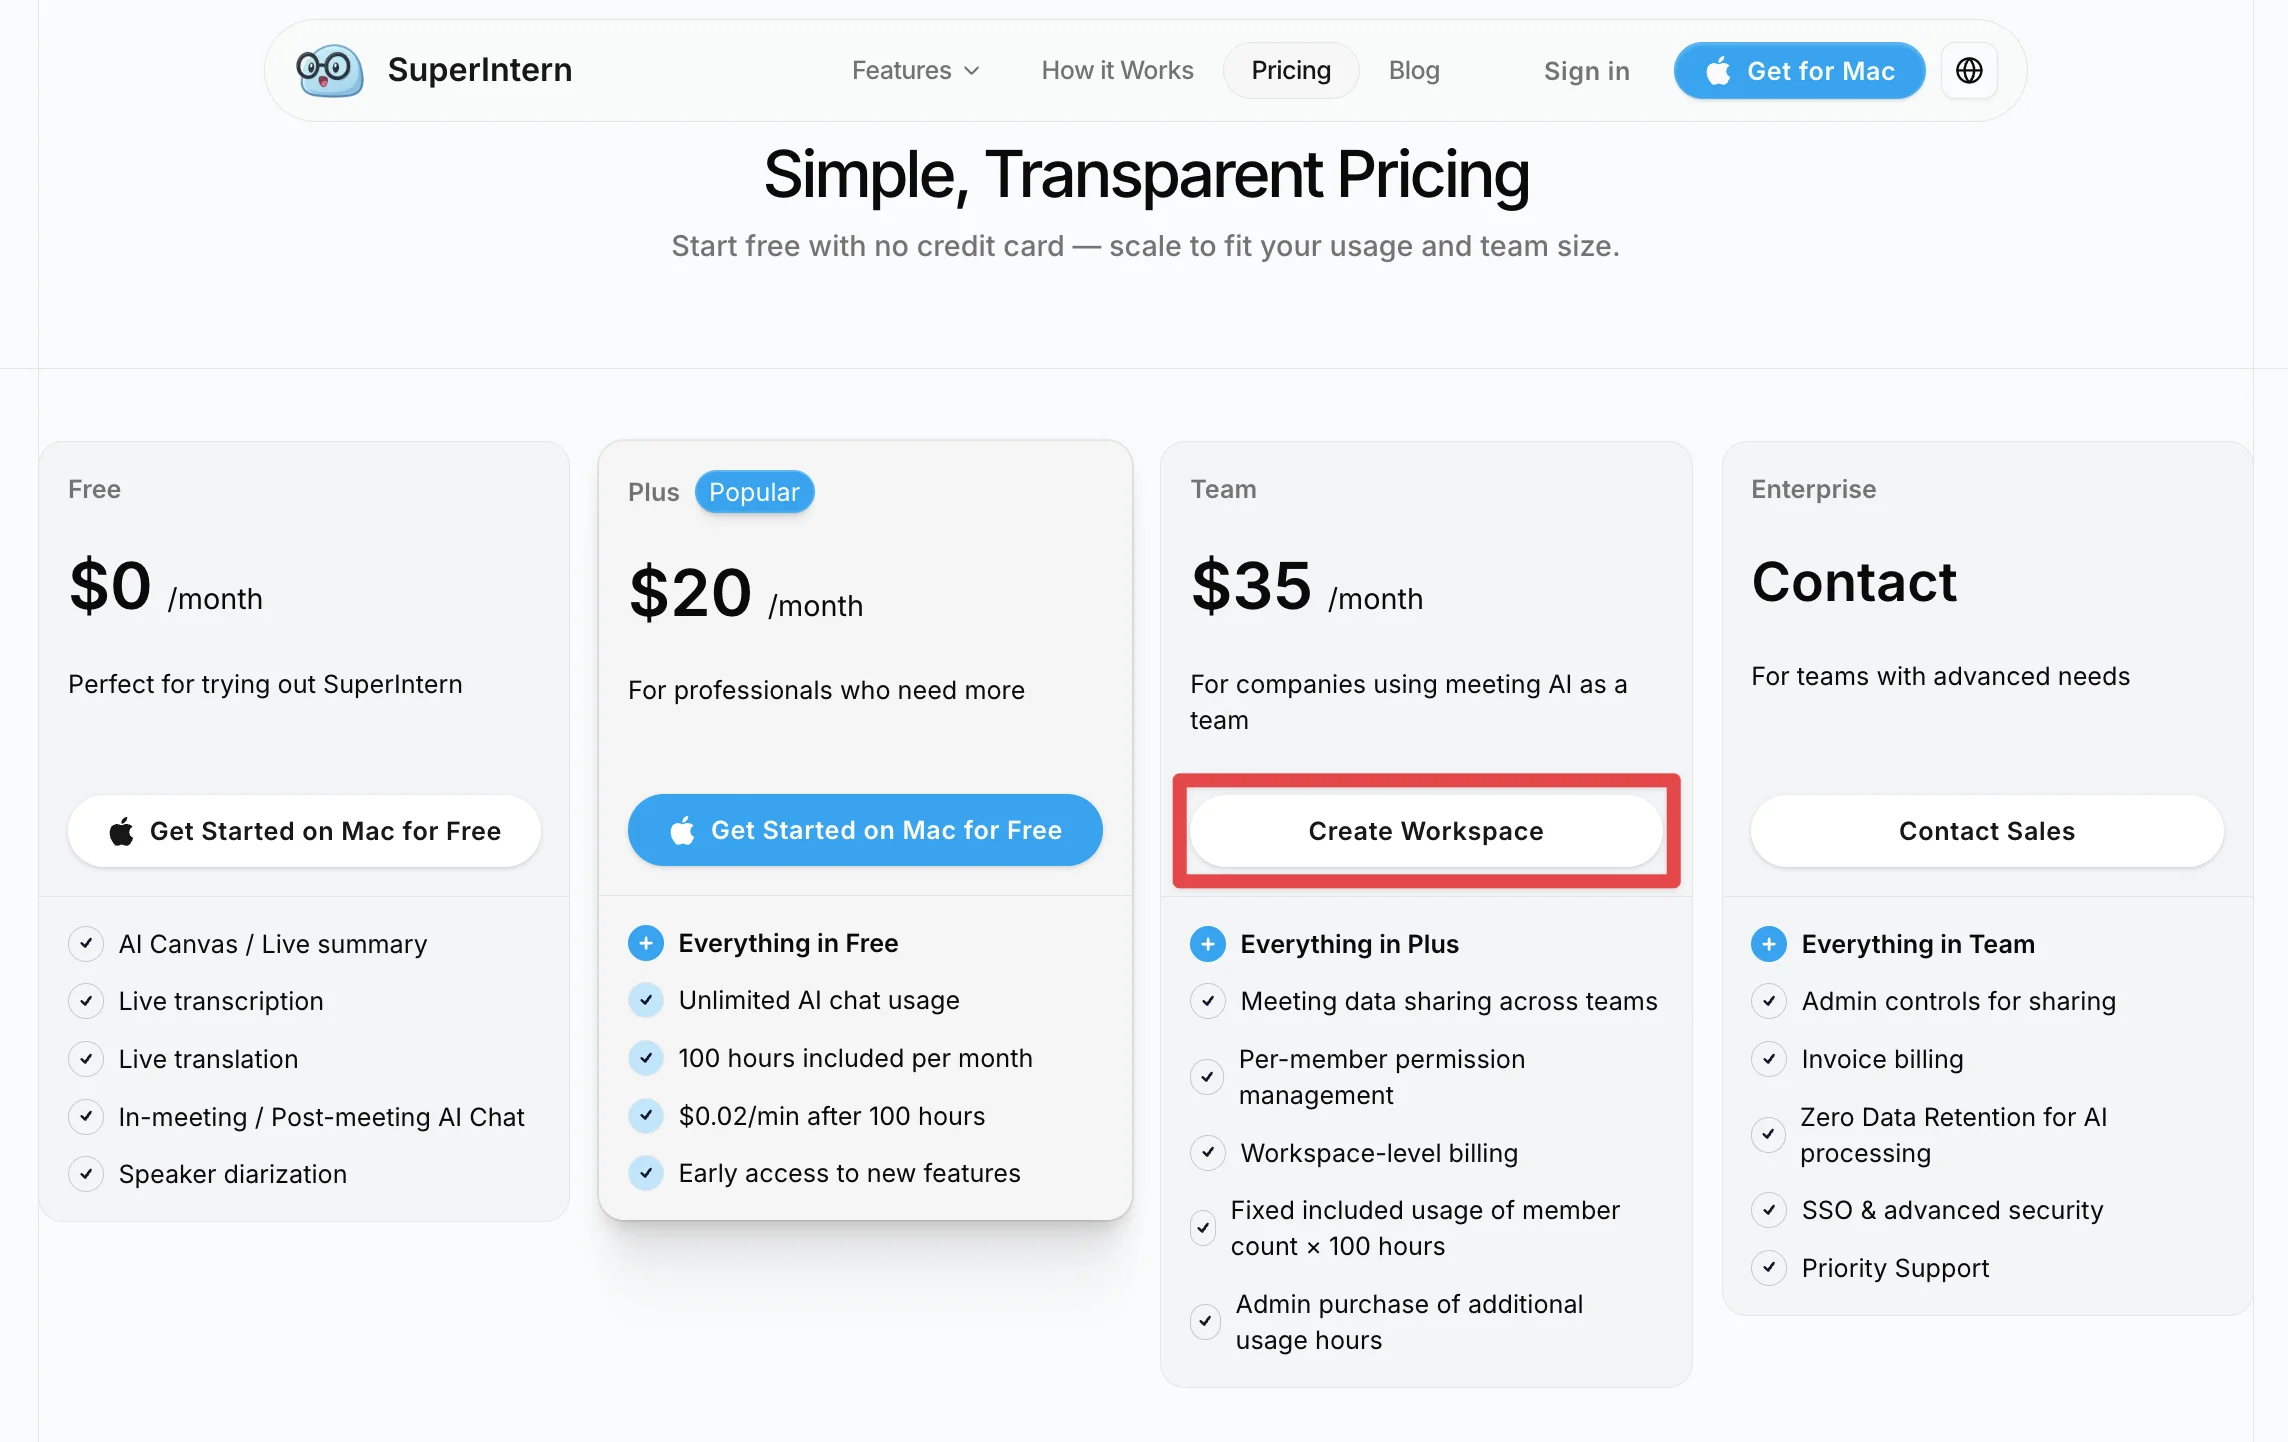
What the Team plan includes
The Team plan costs $35 per user / month and includes:
- Multiple members in a single Workspace
- Workspace-level billing and card management
- Member permission management (Admin / Member)
- Private storage and Workspace sharing for meetings
- Seats × 100 hours per month, shared across the whole team (purchase add-on hours if needed)
Billing is monthly, based on the number of members in your Workspace. When members are added, the additional seats are reflected in your next invoice.
Admin: how to sign up
There are two entry points to the Team plan registration screen. For Step 1, you can take either A or B; from Step 2 onward, the steps are the same.
Step 1-A: from the pricing page
- Open the pricing page and select the Team plan.
- Click "Create Workspace".
- If you don't have a SuperIntern account yet, follow the on-screen instructions to sign up. You can register with your email address or a Google account.

- Once you're signed in, the Team plan registration screen (Workspace creation) appears.
Step 1-B: from the workspace switcher in the web app
If you already use SuperIntern, you can also sign up from the web app.
- Log in to the web app and open the workspace switcher in the top-left corner.
- Click "Add workspace".
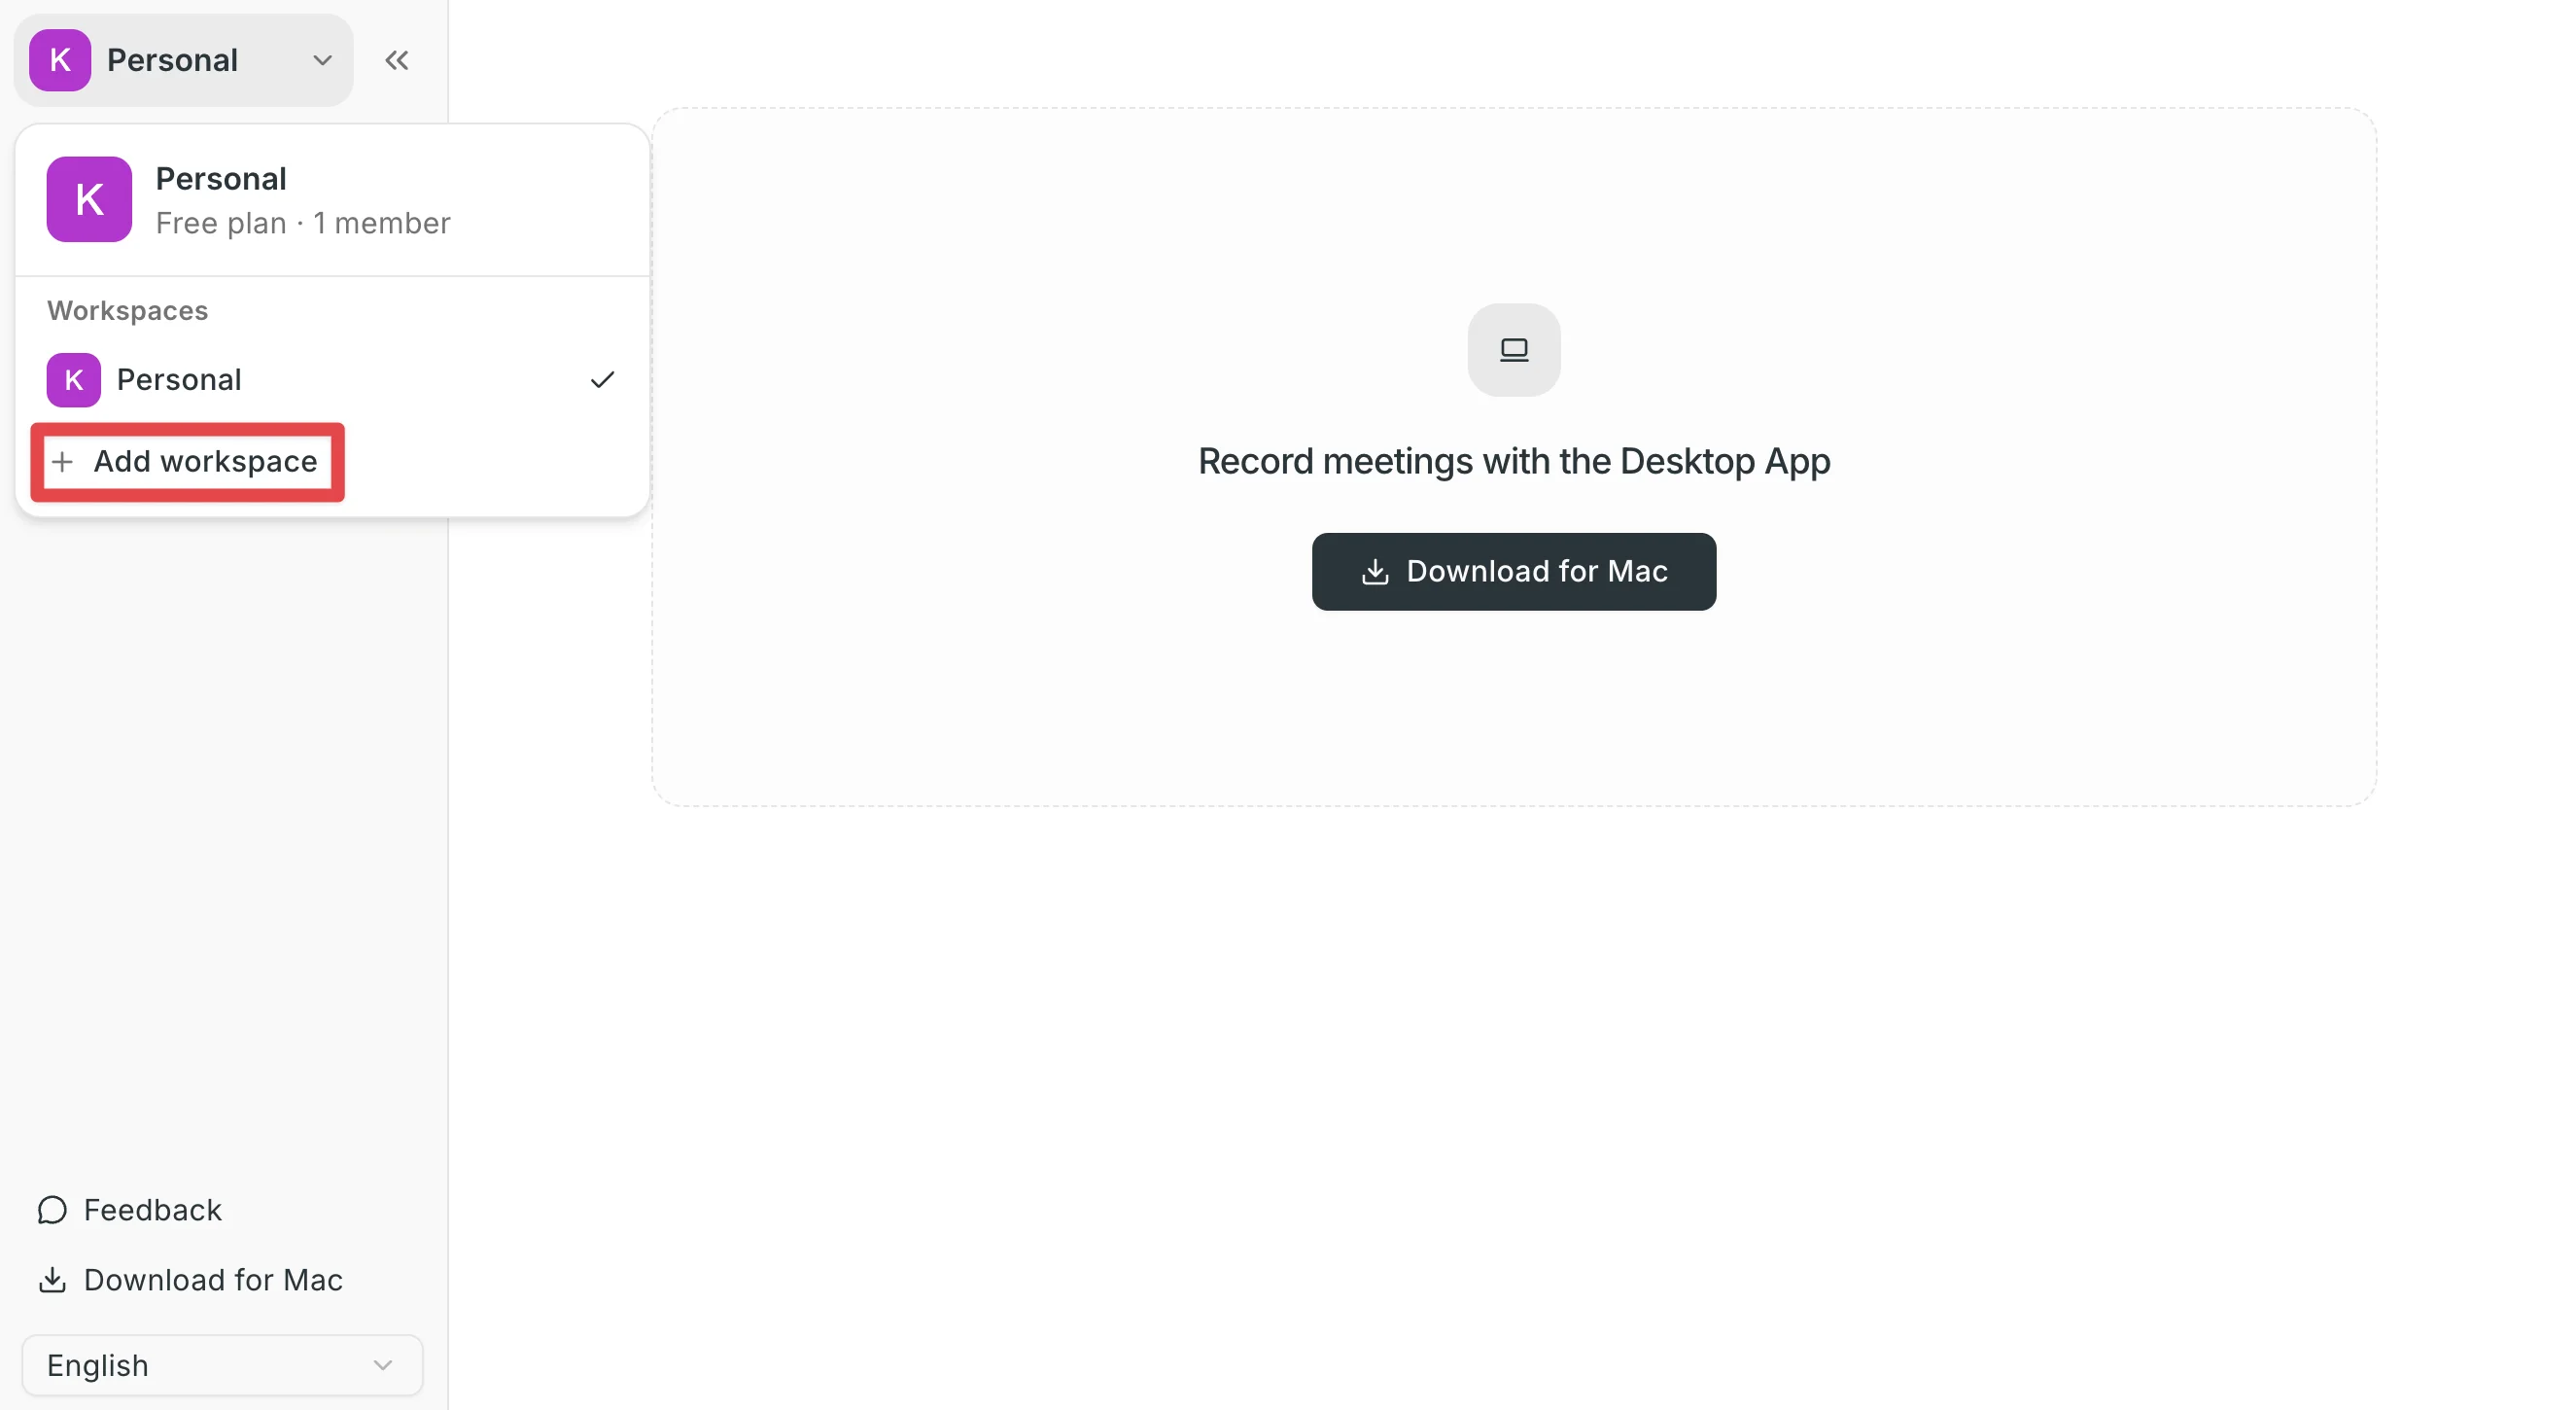
- The Team plan registration screen (Workspace creation) appears.
Step 2: Create your Workspace and complete payment
- On the registration screen, enter a Workspace name (for example: NanoHuman Workspace). You can change it anytime later.
- Click "Start Team plan".
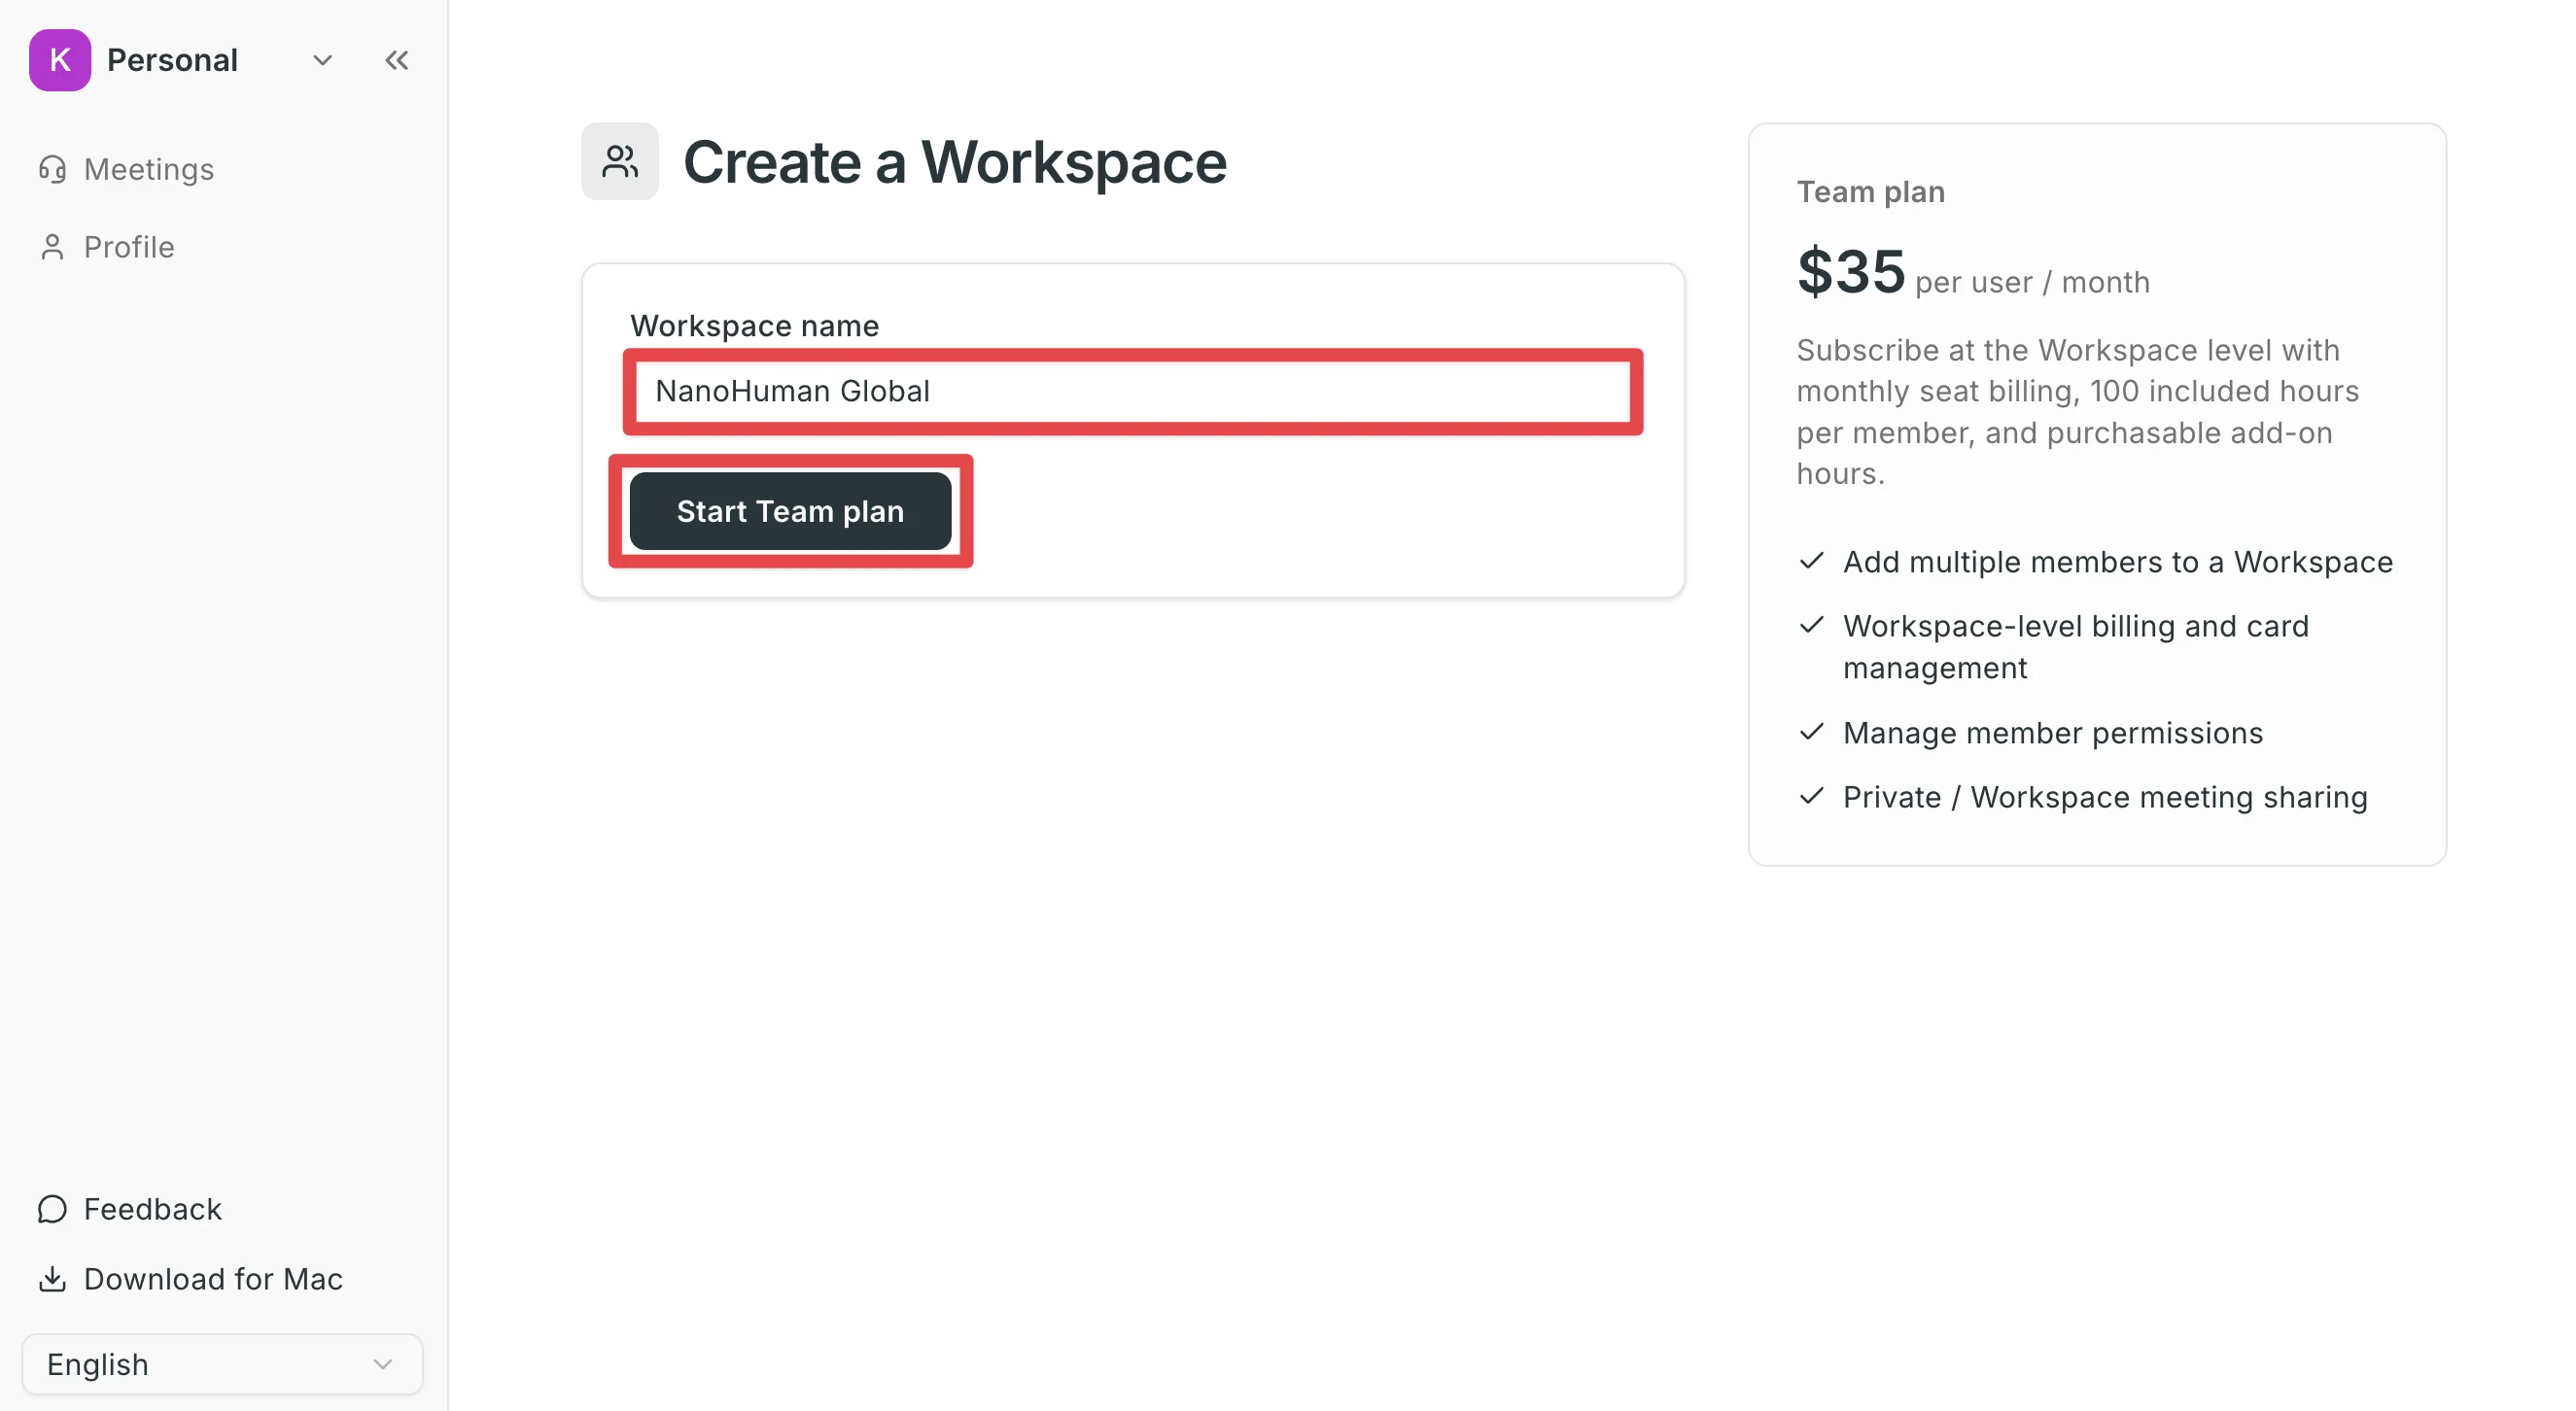
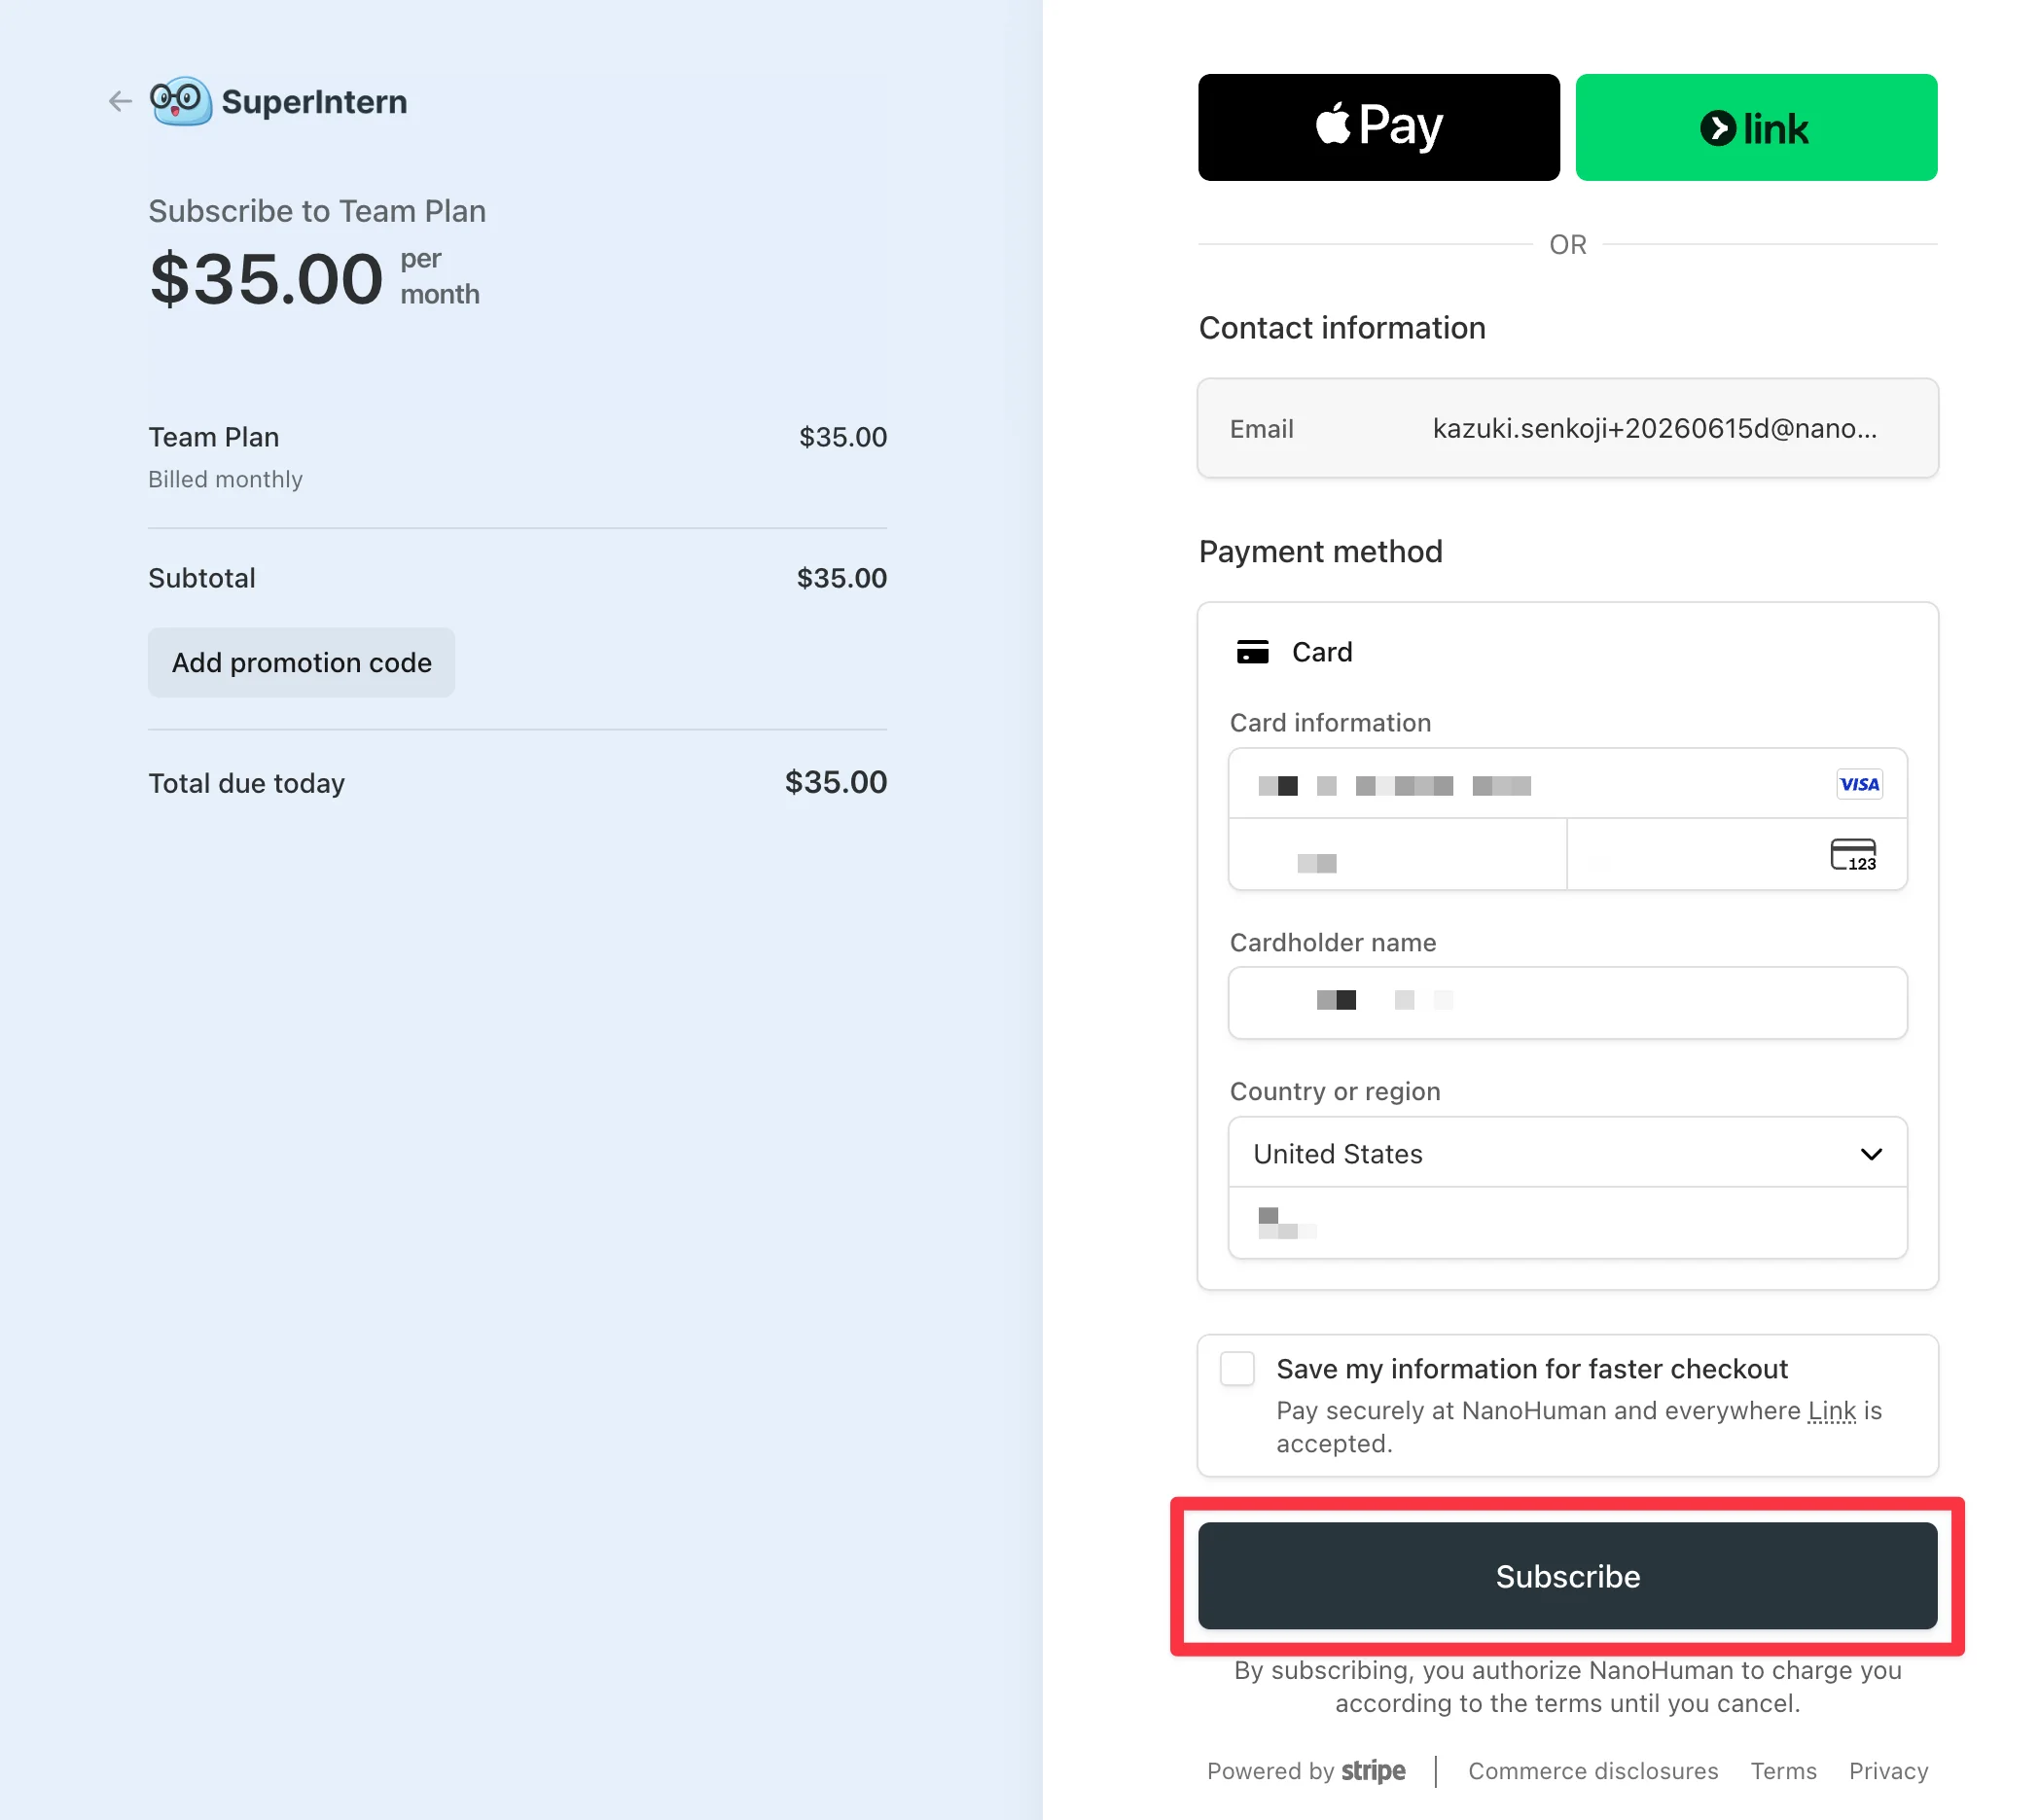
- You'll be redirected to the payment screen (Stripe). Enter your card details and complete the payment.
- Once payment is complete, you'll be taken to the Workspace settings screen. Your Workspace is now ready.
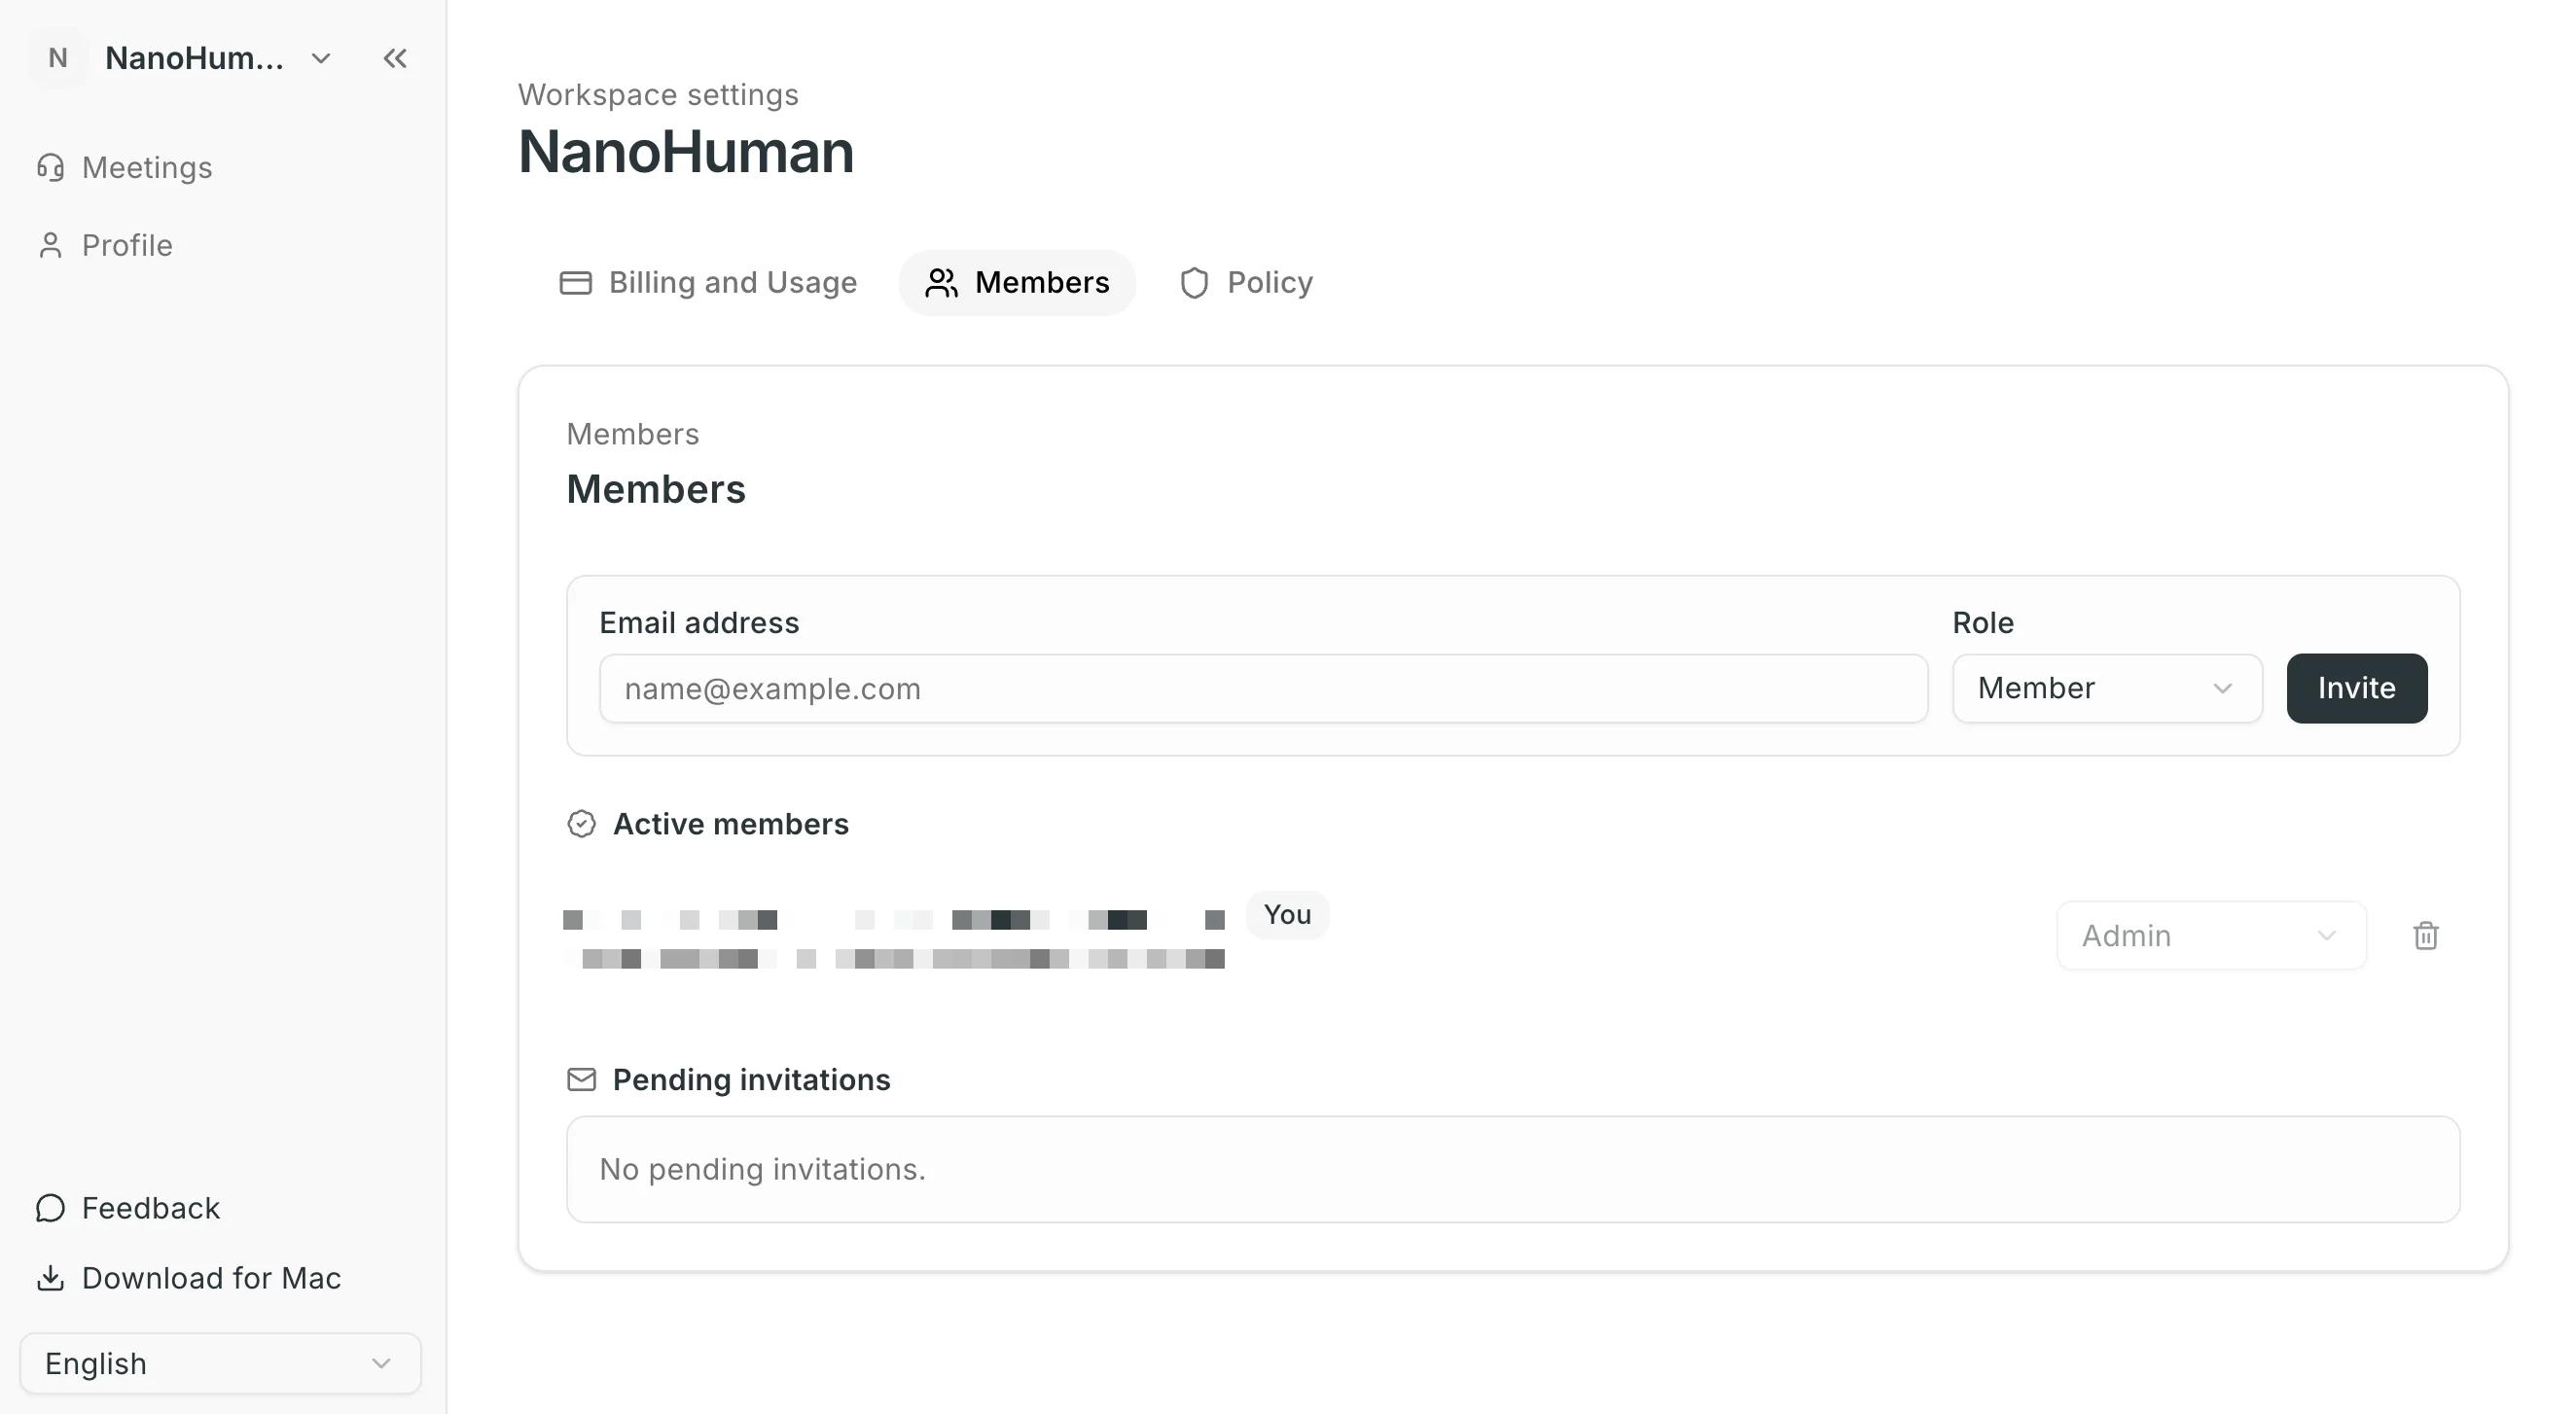
Step 3: Invite members
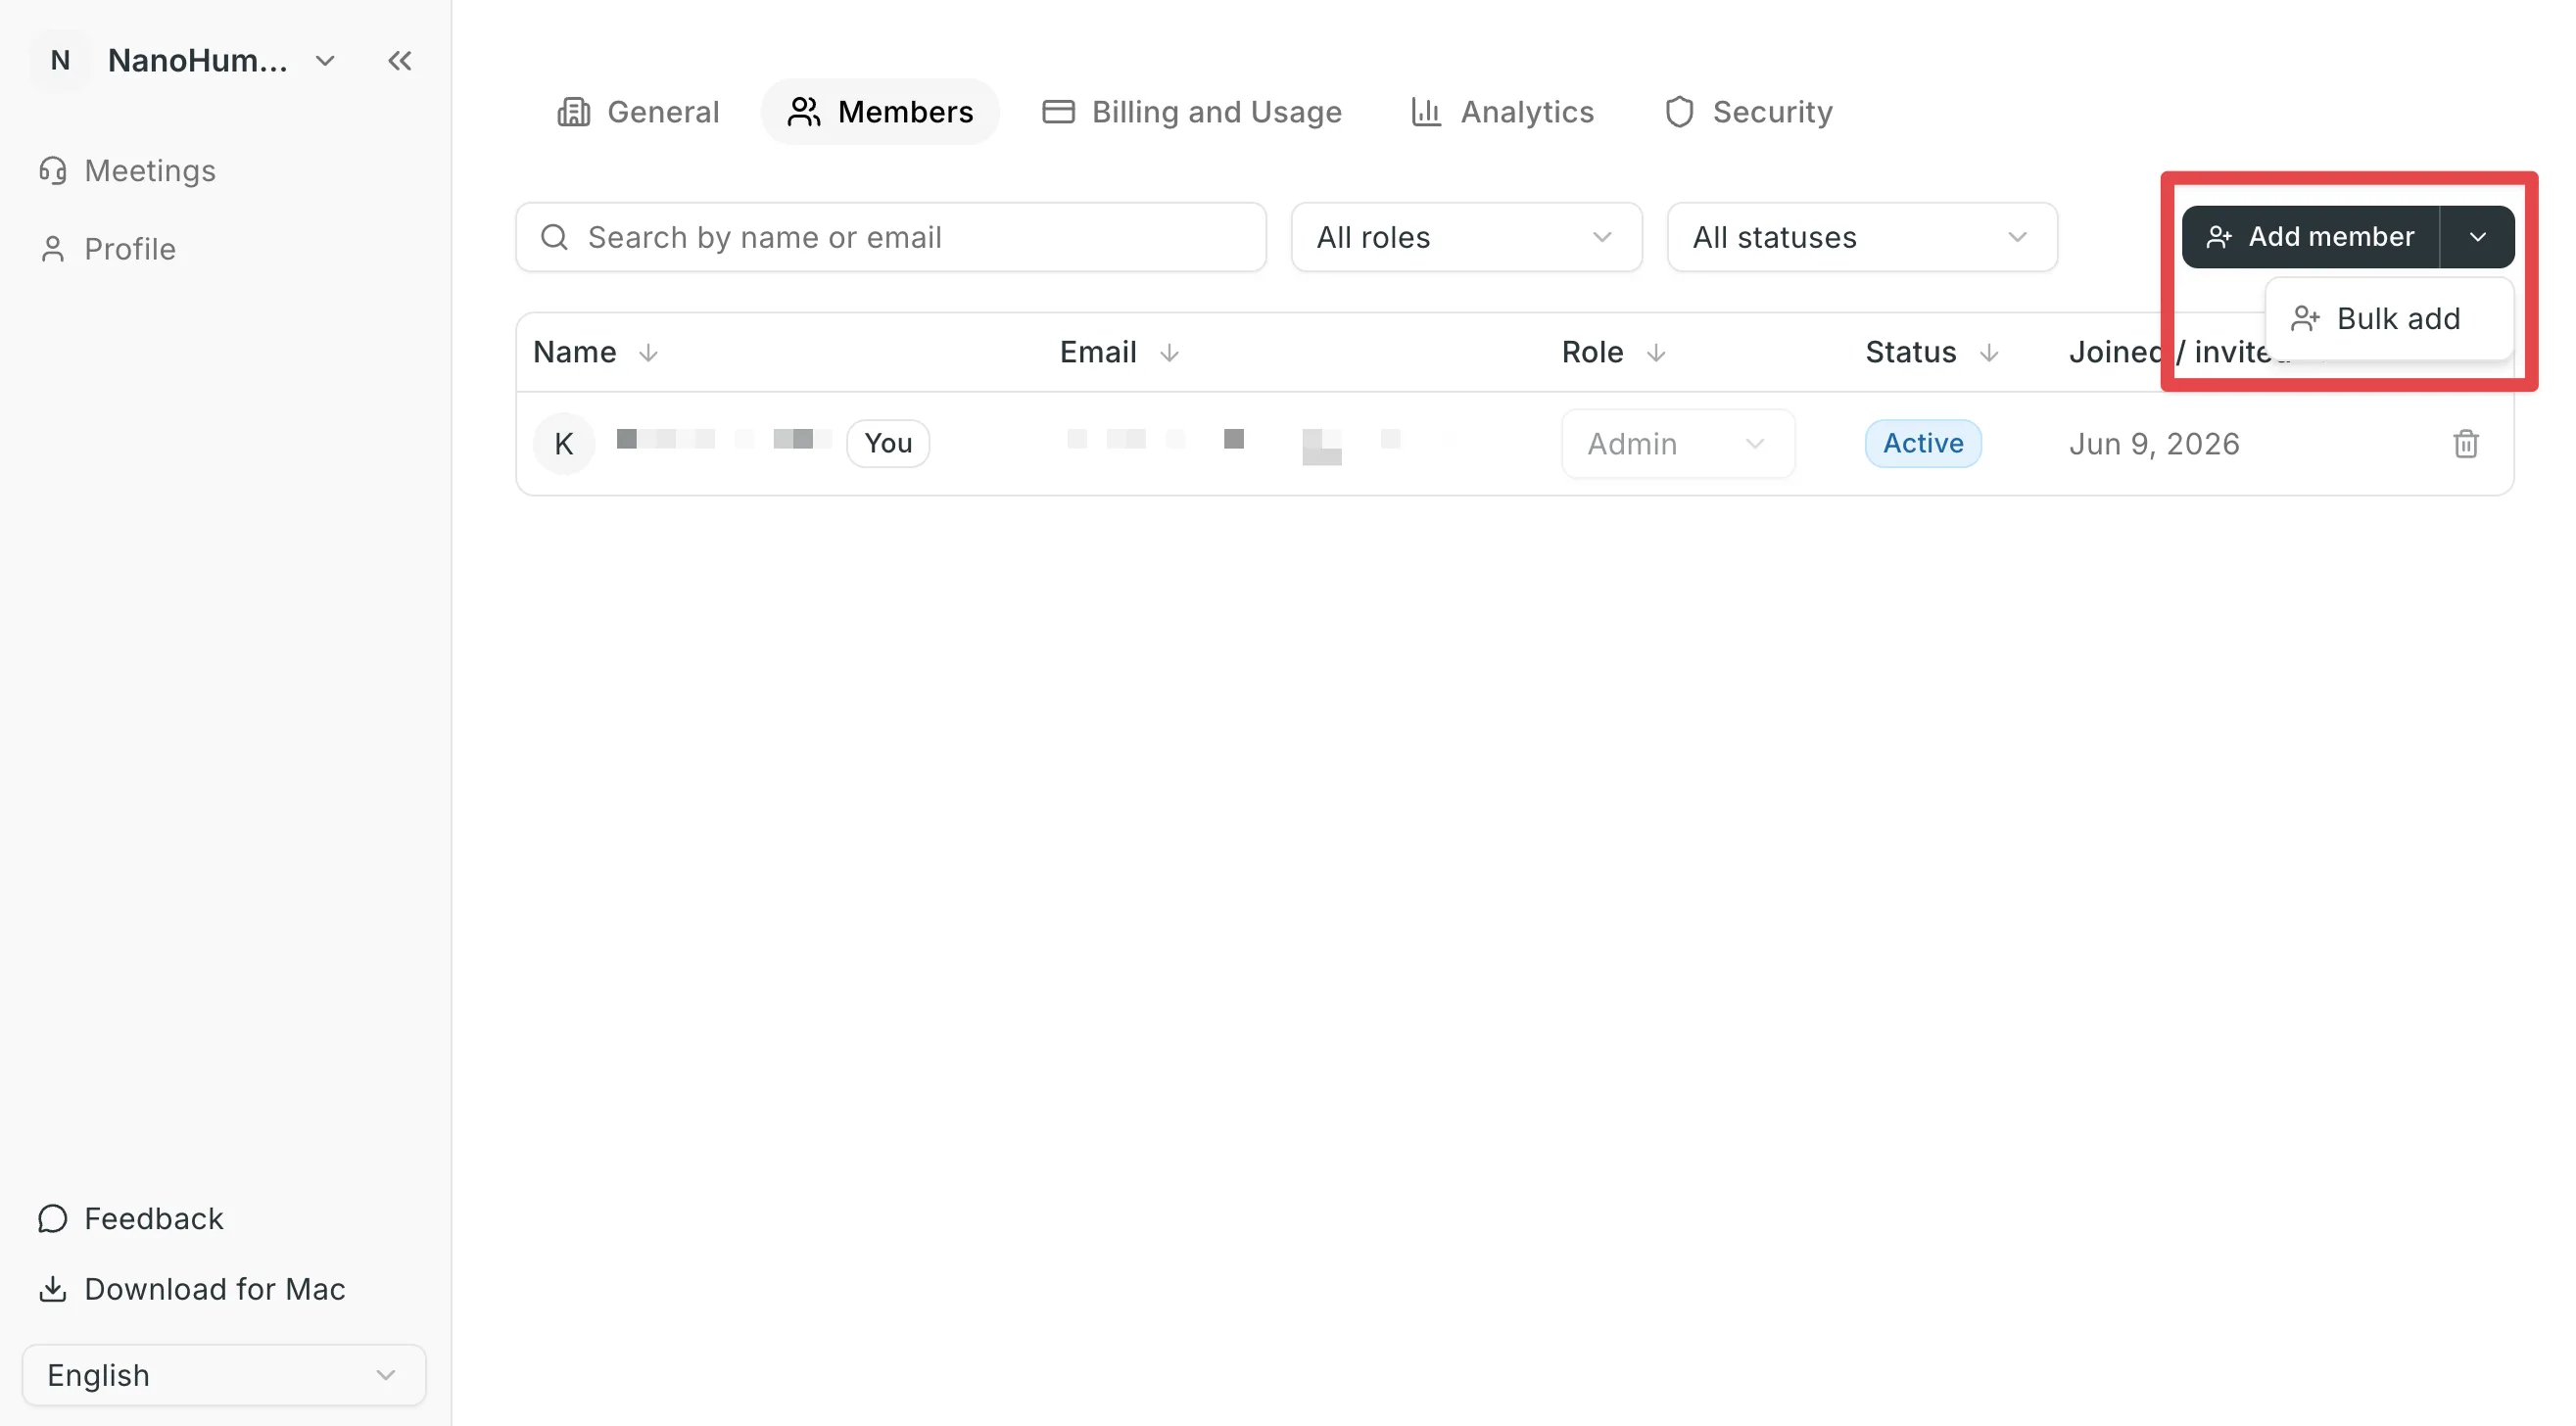
Open the "Members" tab in your Workspace settings. There are two ways to invite members, so you can pick whichever fits your situation:
- Add members one by one: specify each email address and role individually
- Add members in bulk (bulk invite): paste multiple email addresses, or import a CSV / TSV / TXT file to invite everyone at once
Add members one by one
- Click "Add member".
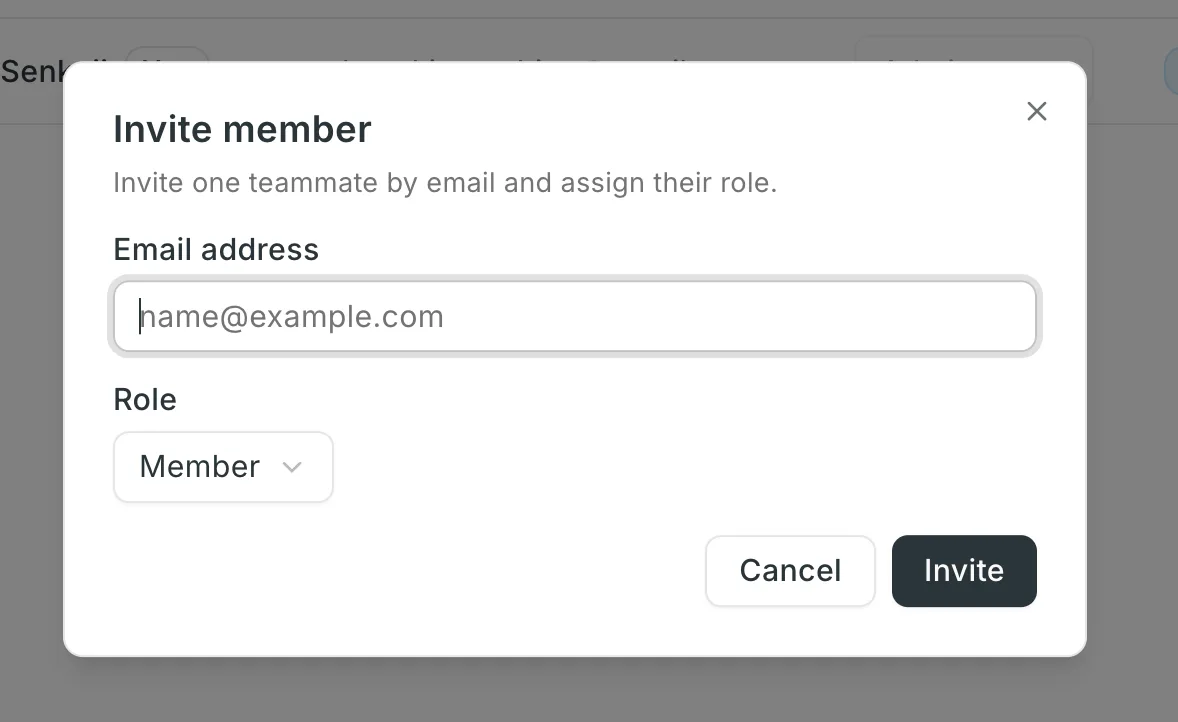
- Enter the email address of the member you want to invite.
- Choose a role (Admin / Member).
- Admin: can invite members, change permissions, and manage billing
- Member: can use the Workspace as a regular member
- Click "Invite", then confirm to send the invitation email.
Add members in bulk (bulk invite)
- Click the "∨" next to the "Add member" button and choose "Bulk add".

- Paste multiple email addresses, or use "Import from file" to load a CSV / TSV / TXT file. Pasting from a spreadsheet is also supported.
- In the preview table, check the role and status (Valid / Duplicate / Already member / Already invited) of each row. You can invite up to 200 members at once.
- Click "Invite N members" to send invitation emails to all selected members at once.
Once sent, an invitation email is delivered to each member's address.
Note that once an invitation is accepted, that member becomes a billable seat. Each additional seat also adds 100 hours to your Workspace's shared monthly allowance.
You can check the status of each invitation (Invited / Active) in the "Members" tab at any time, and revoke pending invitations if needed.
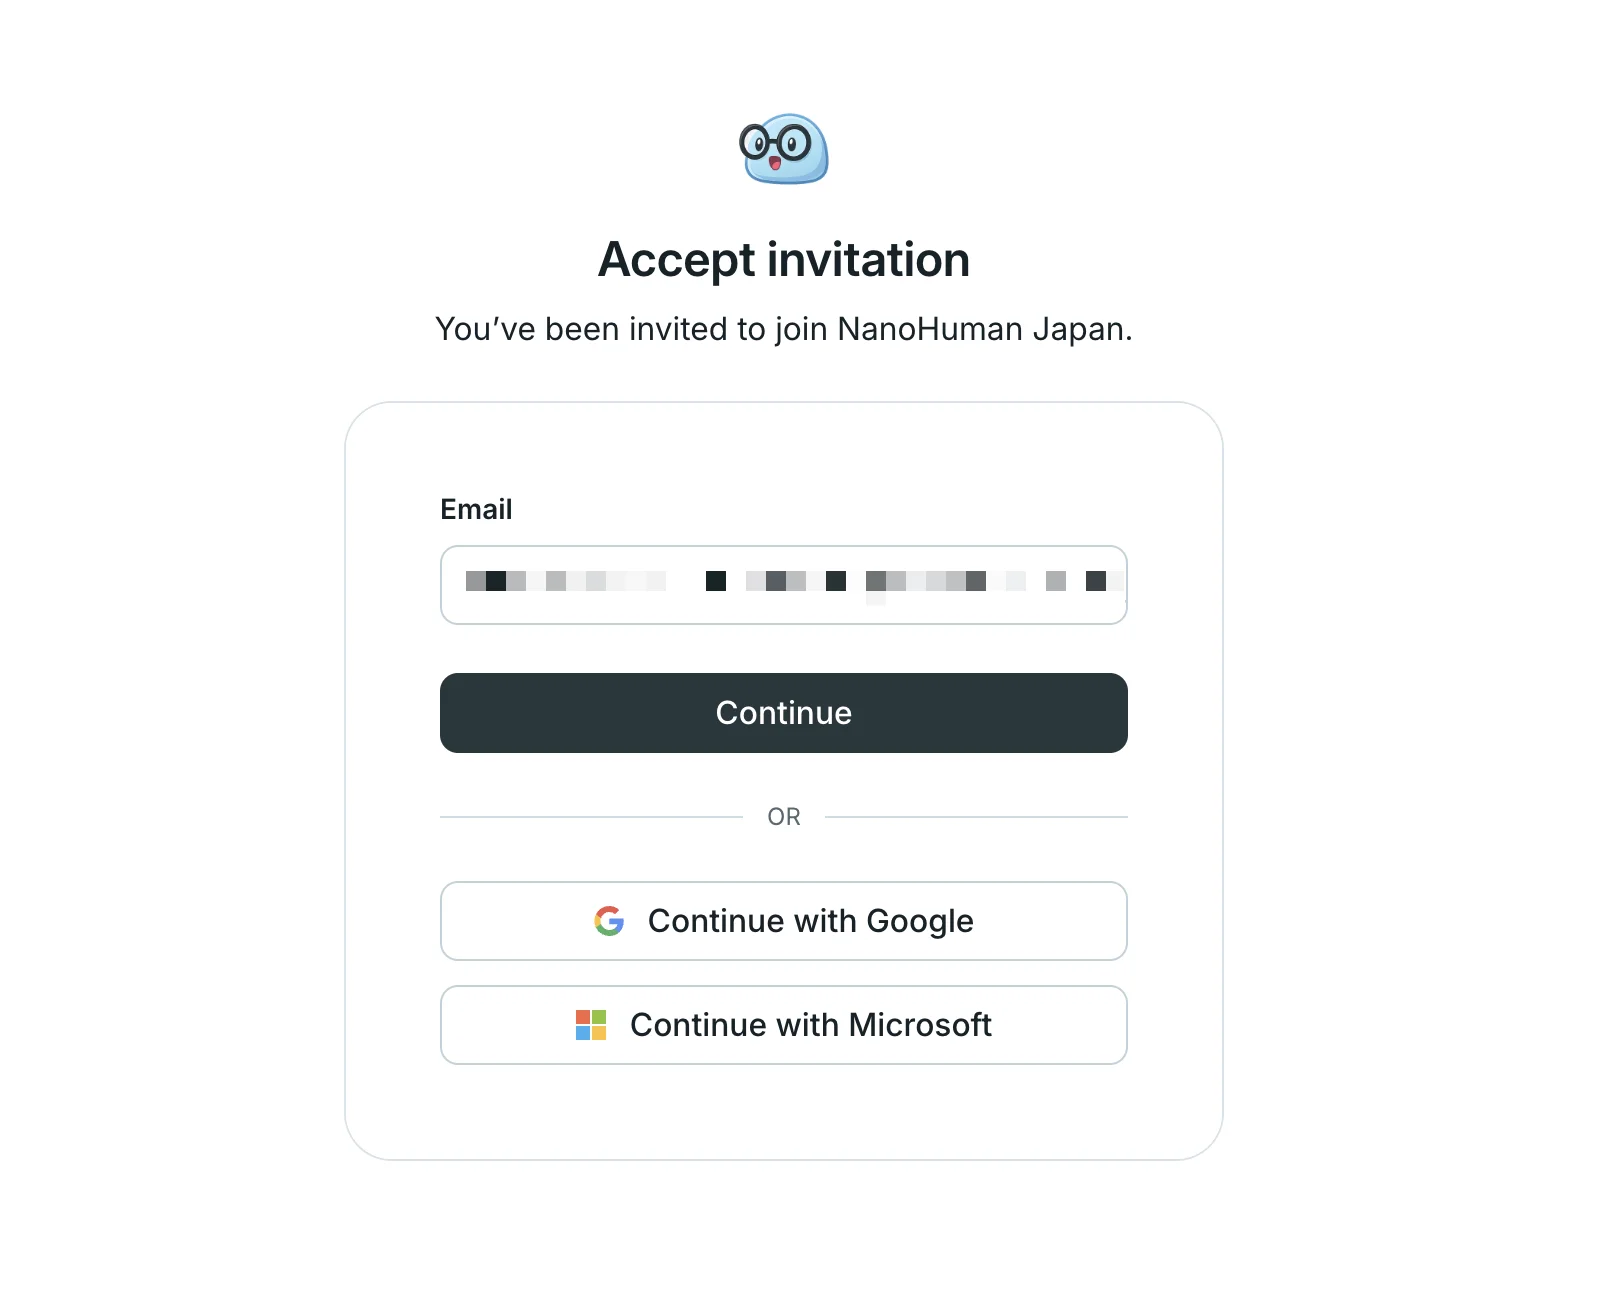
Members: how to join from an invitation
When an admin sends an invitation, the member receives an invitation email.
Step 1: Open the invitation email
Open the invitation email and click the join link.

Step 2: Authenticate
Follow the on-screen instructions to authenticate. If you don't have a SuperIntern account yet, you can create one with the invited email address.
Step 3: Switch to your Workspace
Once authentication is complete, you've joined the Workspace. You can switch to it from the workspace switcher in the top-left corner.
After joining, you can choose between keeping meetings private or sharing them with the whole Workspace, and start using SuperIntern as a team.
FAQ
Q. How is the price calculated?
A. Monthly billing of $35 per member in the Workspace. A member becomes billable once they accept the invitation.
Q. Is there a usage limit?
A. The Workspace shares a monthly allowance of seats × 100 hours across the whole team. If you need more, you can purchase add-on hours at $1.20 per hour.
Q. How many members can I invite at once?
A. With bulk invite, you can invite up to 200 members at a time. Importing CSV / TSV / TXT files and pasting from a spreadsheet are both supported.
Q. What happens if members are removed mid-cycle?
A. Seat changes are reflected in your upcoming invoices.
Ready to bring your whole team's meetings into SuperIntern?